Building a static multi-language site with Metalsmith (part I)
| Tags: front-end
These holidays I decided to start compiling my cooking recipes online, since some of my friends ask for them and I've grown tired of creating gists for them. And then, the dilemma: should I upload the recipes in English or in Spanish? I couldn't decide since some of my non-Spaniard friends have asked me for some recipe occasionally.
The solution: create a multi-language web with a static site generator. I opted for Metalsmith, since I prefer to use Node nowadays. And it turned out that the documentation for doing this kind of sites is not that great, so I thought it would be good to share how I did it.
While I was writing this post I got well over 1500 words, so I decided to split it up in two parts:
- Part I: A basic site with Metalsmith (this one)
- Part II: Adding multi-language support
If you are already familiar you can jump into the second part right away. You can also see the final source code for this example project in Github.
And, of course, this is my online cookbook ;) It only has a handful of recipes right now, but I will be adding more.
The basic pipeline
OK, time to start! We will build the skeleton for a multi-language cookbook. First create an empty directory for this project and install Metalsmith:
npm install --save metalsmithLet's make a directory where our content will live and put a sample file there.
mkdir content
touch content/index.html
Create an index.js file. We will put our site's code in there.
var path = require('path');

var metalsmith = require('metalsmith');

metalsmith(__dirname)
  .source('content')
  .destination('dist')
  .build(function (err) {
    if (err) {
      console.error(err);
    }
  });
Metalsmith works by processing the files inside a directory (which we indicate with .source()) and copying them to a different directory (indicated via destination). The copying part happens when we call build(). In this pipeline we can inject our own middleware –or existing plugins– to modify these files.
For example, this is how our current directory looks now:
.
├── content
│   └── index.html
├── index.js
└── package.json
Running node index.js will create a dist directory with the index.html file inside it.
dist
└── index.html
Transforming files
Having your content in Markdown is something common, whether you are creating a website, or writing a book, etc.
We can use an existing plugin to process markdown and convert it to HTML. This plugin also allows us to add metadata fields to our files, which can then be used by other plugins, or to pass that data into layouts, etc.
With the Markdown plugin, this metadata must be added at the top of the file in YAML format. Rename the content/index.html to content/index.md and edit it:
---
title: Home
---

My collection of **recipes**.
Install the plugin:
npm install --save metalsmith-markdownNow we just need to require it and add it to Metalsmith's pipeline:
var path = require('path');

var metalsmith = require('metalsmith');
var markdown = require('metalsmith-markdown');

metalsmith(__dirname)
  .source('content')
  .destination('dist')
  .use(markdown())
  .build(function (err) {
    if (err) {
      console.error(err);
    }
  });
If you execute the code now, you will see that a dist/index.html is generated, with HTML code parsed from Markdown:
<p>My collection of <strong>recipes</strong>.</p>Right now we are not using the title metadata field, but it will come handy later.
Copying over raw assets
Besides our content, we'll also have some assets (images, CSS files, etc.) that don't require processing but we still need to copy to our dist folder.
There's the metalsmith-assets plugin just for that:
npm install --save metalsmith-assetsWe will store our assets in an assets folder in the root of our project. The content of this folder we'll be copied to dist.
For example, let's drop a CSS file into assets/css:
.
├── assets
│   └── css
│       └── styles.css
├── content
│   └── index.md
├── index.js
└── package.json
And add the following to the code:
// ...
var assets = require('metalsmith-assets');

metalsmith(__dirname)
  // ...
  .use(
    assets({
      source: 'assets',
    })
  )
  .build(function (err) {
    if (err) {
      console.error(err);
    }
  });
Running it will yield the following dist structure:
dist
├── css
│   └── styles.css
└── index.html
Using layouts
We don't want to repeat the same HTML code in all of our content files. This is what layouts are for: we can use an engine (Handlebars, Swig, etc.) of our choice and then passing to the layout the file's data.
All file objects in metalsmith have a contents attribute with its full (processed) contents. It will also have an attribute per each metadata field.
In my cookbook I opted for using Jade as template engine. Besides it, we need to install the metalsmith-layouts plugin.
npm install --save jade metalsmith-layoutsNow create a layouts directory with a default.jade file inside:
doctype html
head
    title Cookbook - #{title}
    meta(charset='utf-8')
    link(rel='stylesheet', href='/css/styles.css')
body
    header
        h1 Cookbook
    main: article
        h1= title
        != contents
You can see that we will be using two attributes of the files: their title metadata field and their contents.
When adding the metalsmith-assets plugin to the pipeline, we just need to specify the layout engine of our choice, the default layout to use in case the file hasn't specified it into its metadata, and also a glob pattern of files to apply the layout to.
Note that since the files have been already processed with Markdown, this glob pattern need to match .html files instead of .md:
var layouts = require('metalsmith-layouts');

metalsmith(__dirname)
  // ...
  .use(markdown())
  .use(
    layouts({
      engine: 'jade',
      default: 'default.jade',
      pattern: '**/*.html',
    })
  );
// ...
Run it and voilà:
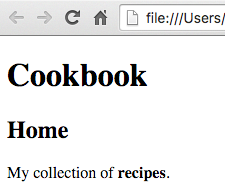
Continue on part II.